Saturday, February 26, 2011

Pom pom trim and vintage looking jar

Hello hello, crafting friends... I hope you are all doing well.

Just quickly popping by today with a card and my newest find, a vintage looking jar in a local store that I turned into button storage. When I found it, it was dusty- but I brought it home, washed it and oh it is so pretty. A new happy home for these Designer Big Buttons. Hmm...

For the card, I paired a doily, a vintage style paper called First Edition Specialty DSP (from the Occasions Mini Catalog), a Night of Navy 1 1/4" striped grosgrain ribbon and Melon Mambo pompom trim. Everything is sponged with Soft Suede ink.

Happy stamping and enjoy your weekend, dearies.

Hugs,

Liza

Monday, February 21, 2011

Vintage cupcakes 2

Hello there, crafting friends... How about more cupcake cards?

All of these are using the Party Hearty stamp set.
One in Poppy Parade and the Love Letters DSP ...

This one in Old Olive, Peach Parfait, Daffodil Delight and Concord Crush combo. The patterned paper is from the Ice Cream Parlor DSP (also a Sale a Bration item).

This little detail is added with the Sweet Summer stamp set (a Sale a Bration item) stamped in Early Espresso ink and finished off with little rhine stones.

This one is in Poppy Parade, Rich Razzleberry, Peach Parfait and Pear Pizzazz color combo. I sponged the edges with Soft Suede ink and a sponge dauber. Really love the added depth it adds.

Thank you for stopping by, crafting friends... Happy stamping to you.

Hugs,
Liza

Sunday, February 20, 2011

Vintage cupcake

Happy Sunday, crafting friends...

Last week, my dear friend Karolina came over to visit and we decided we wanted to have some cupcake cards :) So, I said, why not?
I think a girly color is always lovely, so I had picked out this Melon Mambo, Pretty in Pink, Old Olive, Tempting Turquoise color combo.

Patterned paper is from the Ice Cream Parlor DSP (a SAB item). Cupcake image is from the Party Hearty stamp set, colored with markers. I was looking for my Pacific Point marker to color the cup cake base but I couldn't find it- or maybe I had never gotten it in the first place? Ha!! So I settled with Tempting Turquoise marker.

That Melon Mambo pompom trim and the Always Elegant swirl are too cute together :)

Then, we made another cup cake card. This time a more "adult" color combo: Blushing Bride, Elegant Eggplant, Pear Pizzazz and Pumpkin Pie. I think it is yummy, too.
First, I stamped my favorite damask image on the Elegant Eggplant card stock panel. Then colored the cup cake stamp with Regal Rose and Pumpkin Pie markers. Pear Pizzazz scalloped circle punch and matching ribbon finished off this one.
Thank you for stopping by, crafting friends...

Hugs,
Liza

Friday, February 18, 2011

Bliss

Good morning, crafting friends... Have you had your Bliss stamp set yet?
I took out this Bliss stamp set and ran with it :)

I made my own patterned paper by stamping that lovely damask image in Regal Rose on a piece of Naturals Ivory card stock.
The color combo is: Peach Parfait, Pear Pizzazz, Regal Rose, and Concord Crush. Yummy... Button is from the Big Designer Buttons: Springtime Vintage set (in the Occasions Mini catalog).

What do you make today? Happy stamping!!

Liza

Wednesday, February 16, 2011

Bliss and Always Elegant

Hello there, crafting friends... My friend Elysa and I had a play date last week and we pottered around and made these.

Rich Razzleberry card base, paired with Bashful Blue polka dot paper from the Subtles Designer Series Paper Stack, a piece of vintage type paper from the First Edition Specialty DSP, and a piece of Pumpkin Pie scrap.

Then I had stamped this beautiful swirl image from the Always Elegant stamp set in Early Espresso right on top of the patterned paper. Then, I took my Sponge Dauber and subtly and gently rubbed Pumpkin Pie ink on the swirls. I think it gives a lovely look about it.

Matching Pumpkin Pie sentiment with a rhinestone. Rich Razzleberry ribbon. Then, I had to add that Daffodil Delight button from the Designer Big Buttons Sew Suite pack next to the swirl to bring the eye to that part of the detail.

We both proclaimed that we love it :) We both love the vintage look :)

Next is a quick card using the cheerful patterned paper from the Ice Cream Parlor DSP which is available currently as a Sale a Bration gift. I added a doily, vintage flowers made from the Fun Flowers die, a Melon Mambo big button and a Daffofil Delight 1/4" grosgrain ribbon.

That Pumpkin Pie stamped butterfly is from the Bliss stamp set. I love LOVE love that set!! It makes everything beautiful :) A pearl and a Stampin' Dimensional finished it off.

Then another quick card using the ruffled ribbon technique I saw in Maureen Merritt's blog here.
Here is a close up detail of the ruffled ribbon. I find that I love pairing subtle colors with bright colors. Just makes me happy to see them together.

Thank you for visiting today.

Happy stamping,

Liza

Monday, February 14, 2011

Petal Cone and vintage banners cards

Happy Valentine's Day, crafting friends... Do you have any special plans for today?

Here are some projects I made over the weekend with Concord Crush color in one way or another. I have arranged them together. Looking at those colors make me happy :)

First up is this lovely Petal Cone die that I had made when my friend Lily came over to visit. I had stamped the branches image from the Easter Blossoms stamp set in Concord Crush ink. Then I ran them into my Big Shot with the Perfect Polka Dots embossing folders.

I had added die cut flowers from the First Edition Specialty DSP, Pretty in Pink buttons and Dotted Scallop Ribbon border in Pretty in Pink as well. Always Artichoke ribbon finished it off.

Next is a Melon Mambo card with vintage style banners. I had stamped a piece of Naturals Ivory card stock with the same branch image from the Easter Blossoms set in Concord Crush.

Buttons, punched tiny flowers, pearls and a Daffodil Delight ribbon finish up the card.

Then, a similar card in Certainly Celery. I had a stack of these tiny paper scraps from a bigger project so these come perfect for these banner cards.

And one in Daffodil Delight. I love the doily on top of that First Edition Specialty DSP. I think they look good together.

I have put my Sponge Dauber to work by inking all paper edges in either Soft Suede or Crumb Cake, depending on the look I want to achieve that day :)

Sentiment is from a new hostess level 2 set in the Occasions Mini catalog called: Something to Celebrate.

Happy stamping to you!!

Liza

Saturday, February 12, 2011

Always Elegant

Good morning, crafting friends... here is a card that I made with the FTL127 sketch from the Clean and Simple Stamping blog that I never fail to check every week :)
I flipped the sketch.

I wanted to wrap that 1 1/4" Night of Navy striped ribbon :) I thought a Poppy Parade card base and a Daffodil Delight card stock panel gave it a dose of colors. Everything else remains subdued.

Here is a detail of the stamped swirl from the Always Elegant stamp set, that is currently available as a Sale a Bration gift (until March 31, 2011).

The sentiment is also from the same set. I had added a pearl next to the sentiment and popped it up with Stampin' Dimensionals.

Thank you for peeking, crafting friends. Have a great weekend.

Hugs,
Liza

Friday, February 11, 2011

Baby Calvin gift set


Hello there, crafting friends... Now that my dear friend/ downline Huey has emailed me that she had received this baby gift set that I had created for her new little bundle, I can share this in the blog :)

A frame that says Peace Love Joy. I know it is a Christmas sentiment, but I think this is fitting for a little baby, too, right?

A matching card, using the Funky Four stamp set- colored with markers.

And of course, I had to add a matching paper pennants banner to the set!! :) All bright colors with matching buttons. Yum...

Ok, dear friends... enjoy your Friday!!

Hugs,

Liza

Thursday, February 10, 2011

Paper banners on canvas and more banners

Hello there, crafting friends... How has your week been? I have been busy crafting away in my craft room, as you can see :)

I am so in love with making these paper pennants out of the Designer Series Paper Stack. I think the most fun part for me is to combine the different colors combination :) Every time I sit down to make these pennants, the color combo comes out different. Here is one girly one. I wanted colors that look like summer sherbet.

I made both these gifts for my daughter's best friend's birthday. I wanted something that will brighten up a little girl's bedroom. Hopefully they like it.

I had bought the canvas for a while. I had covered the sides with Chocolate Chip 5/8" grosgrain ribbon.

The idea for these smaller paper banner on canvas came because I had a lot of left over triangle papers in different colors that it occurred to me if I cut them up into smaller banner and string them together on canvas to make them like they are hanging in the sky, they would look so pretty.

So, here they are. Strung together. Hanging on 1/4" Chocolate Chip grosgrain ribbon and a jumble of buttons of different colors and shapes.

I had gotten some more canvas since then, so maybe I will get started on another project like this :)

Happy stamping, crafting friends.

Hugs,
Liza

Tuesday, February 8, 2011

Batik tutu skirt


Good afternoon, crafting friends...

Look who's coming to visit me today! My friend Ninuk is a children clothing designer and she has a knack to match all these yummy colors! Oh, how we connected when we met, talking the same language of colors and patterns! Check out her new blog Miro Designs and please welcome her warmly to the blogging world, where crafters connect virtually :)

This one is especially my favorite that I picked out for my daughter! If you look really closely, it is a tutu skirt made of cotton batik fabrics. How uniquely Indonesian and yet how fabulously creative of her! My Hannah is of the opinion that all that is pink and girly is awesome so she is very happy that I brought home this one special creation for her. Actually, mommy thinks that if it still fits me, I would love one too!! :)

I had taken that picture with my cell phone, so it was not that clear of a resolution. Sorry. I had made that vintage paper pennant banner for Ninuk's daughter. Love adding that little touch of die cut flowers with the vintage looking First Edition Specialty DSP.

Love having your visit Ninuk and surprise surprise! Before we know it, it was time for her to go meet her daughter home from school! Back to mommy duty :)

Thank you for visiting today, crafting friends.

Hugs,

Liza

Monday, February 7, 2011

Welcome, Baby

Happy Monday, crafting friends... FTL126 is up here and over the weekend, I had some time to play along. Thank you for a wonderful new sketch, Natasha.

Here are 3 cards that are using the sketch as my jumping point.

This one in Regal Rose card base is for a fellow crafter who is welcoming a baby girl soon. Hope she likes it...

I rediscovered my sponge daubers (buried somewhere in a bin) and had been sponge happy. I sponged the edges of these cards with Crumb Cake ink and really like the added depth it brings to the projects and the vintage look it creates. Yipee...
Here is another take on the sketch. I added a layer of Night of Navy patterned paper from the Regals Designer Series Paper stack.

Love adding those stacked flowers there. They come from the Fun Flowers die and used the First Edition Specialty DSP which is on the Occasions Mini. The big button is from Big Designer Buttons: Springtime Vintage. Card base is Daffodil Delight- a delightful yellow :)

Here is another card that is slightly different, using the largest flower in the Fun Flower die. All sentiments used are from the Something to Celebrate stamp set (level 2 hostess set in the Occasions Mini). I bent up the sentiment banner a little bit to add dimension.
Here is the large flower detail. I really love the vintage look of these papers together.

Thank you for visiting, crafting friends. Happy stamping to you.

Liza

Saturday, February 5, 2011

Valentine Defined


Good morning, crafting friends...

I find that stamping mini cards is very relaxing :) Not to mention that because of its mini size, you can stamp a stack in no time. Mine is 3x3" because it fits the Mini Envelopes that I can stamp with matching images. Making them great gifts, as well. Here are some that I stamped in one afternoon while playing in my craft room.

The tree comes from Valentine Defined. Then simply added the butterfly from the Bold Blossoms stamp set (in Melon Mambo ink). Matching envelopes follow.

This one is from the Create a Cupcake stamp set. The idea comes from the Feb. 2011 issue of the Stampin' Success magazine. I love those "flying" hearts in 3 colors: Blushing Bride, Melon Mambo and Riding Hood Red.

And last is from the Nature Walk set.

Ahh... happy to see these mini cards come together quickly.

Happy stamping,

Liza

Thursday, February 3, 2011

Chinese New Year envelope

Happy Chinese New Year morning, crafting friends... It is a long weekend in my son's school and a public holiday here. Yay!! We have a busy day of getting together with family and relatives.

Here are a few more of red envelopes that I made last week. I figured that the color that most matched Chinese New Year feeling is Poppy Parade so here it is. Lots of red everywhere these days, what with Valentine and Chinese New Year at the same time of the year.

This is an altered envelope project. Long Crumb Cake envelope is from the Japanese store Muji (love that place!! There are 2 within 1 mile from our home!!)

I had covered it with Poppy Parade patterned paper from the In Color DSP Stack. Stamped the "strings" from the Valentine Defined stamp set and added the paper lanterns. Voila!! Happy that the Valentine stamp set has more use beyond Valentine's day!!

Here is one more simple one that I had stamped with the Easter Blossoms stamp set. Added a bit of lace, flower and pearl.

Thank you for visiting. Happy stamping to you.

Hugs,
Liza

Tuesday, February 1, 2011

Envelope art

Happy Tuesday, crafting friends... In this part of the world where we live, it is almost Chinese New Year/ Lunar New Year is probably a more appropriate name as not only the Chinese celebrate it. Other countries in Asia do so, too.

One tradition during Chinese New Year is handing these red envelopes to children and single family members.

So, I have been a red envelope making machine, as you can see :)

Here is one that I had made with Riding Hood Red card stock and matching patterned paper from the DSP stack.
If you slide open the gold cord, it will reveal an envelope to put money in. I thought the ornament punch "resembles" an Oriental paper lantern, so there it is, hanging on my red envelope.

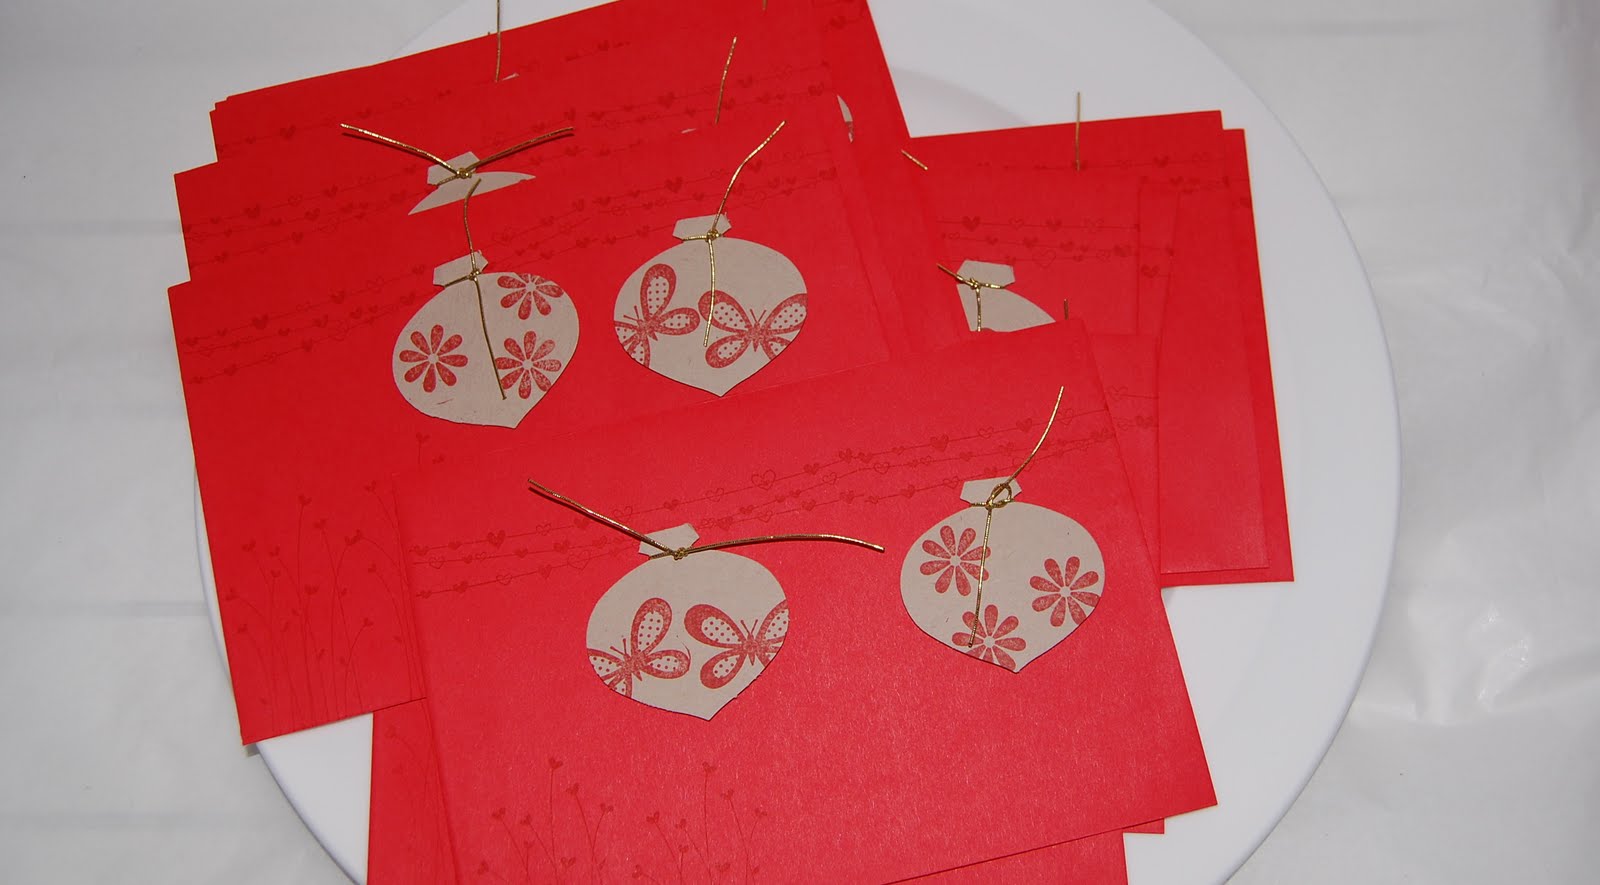
And then I decided that it is too labor intensive to create the 3-fold card, so I looked around and saw these stack of Poppy Parade envelopes that my friend Yvonne picked up for me at the airport in Singapore (yes, by now friends and family know what to bring me as gifts! Anything that I can use around my craft room is always appreciated! And Yvonne only went to Singapore for a day trip, so that is awesome that she even spotted something for me at the airport!!)

Anyhow, that is a ready made base for me to stamp on. With the Valentine Defined stamp set and Poppy Parade ink, I created that scene of hanging lanterns and grass on the ground. Now, this took no time to stamp but some time to tie that gold cord on!! Ha!!

Click on the photo for a larger view. I made a whole stack of them all morning. And then, I am done until next Chinese New Year~~

Thank you for peeking.

Hugs,

Liza